 Millworker
Help / Materials
 Materials Finishes
Assembly
Part
Assign a material or finish to parts from a mini toolbar, without opening the manager.
Where
- An assembly (or a part, where the part itself is the pick). Materials panel → Materials Finishes.
- Choose Material or Finish in the first list; the other list is greyed out.
- For a material, choose it. For a finish, choose its type first (Finishes, Coatings, a tab you added such as Paints, Veneers or PLAM), and the finish list shows only that type.
- Click parts (or drag a window). Click a picked one to take it out. Parts selected before you started are picked.
- Apply puts it on and starts a new pick; OK puts it on and finishes; Cancel leaves anything not applied.
Screenshot placeholder
images/materials-finishes.png
1600 × 900 px
Assembly with three panels picked, Materials Finishes mini toolbar showing Material chosen and a material in the list.
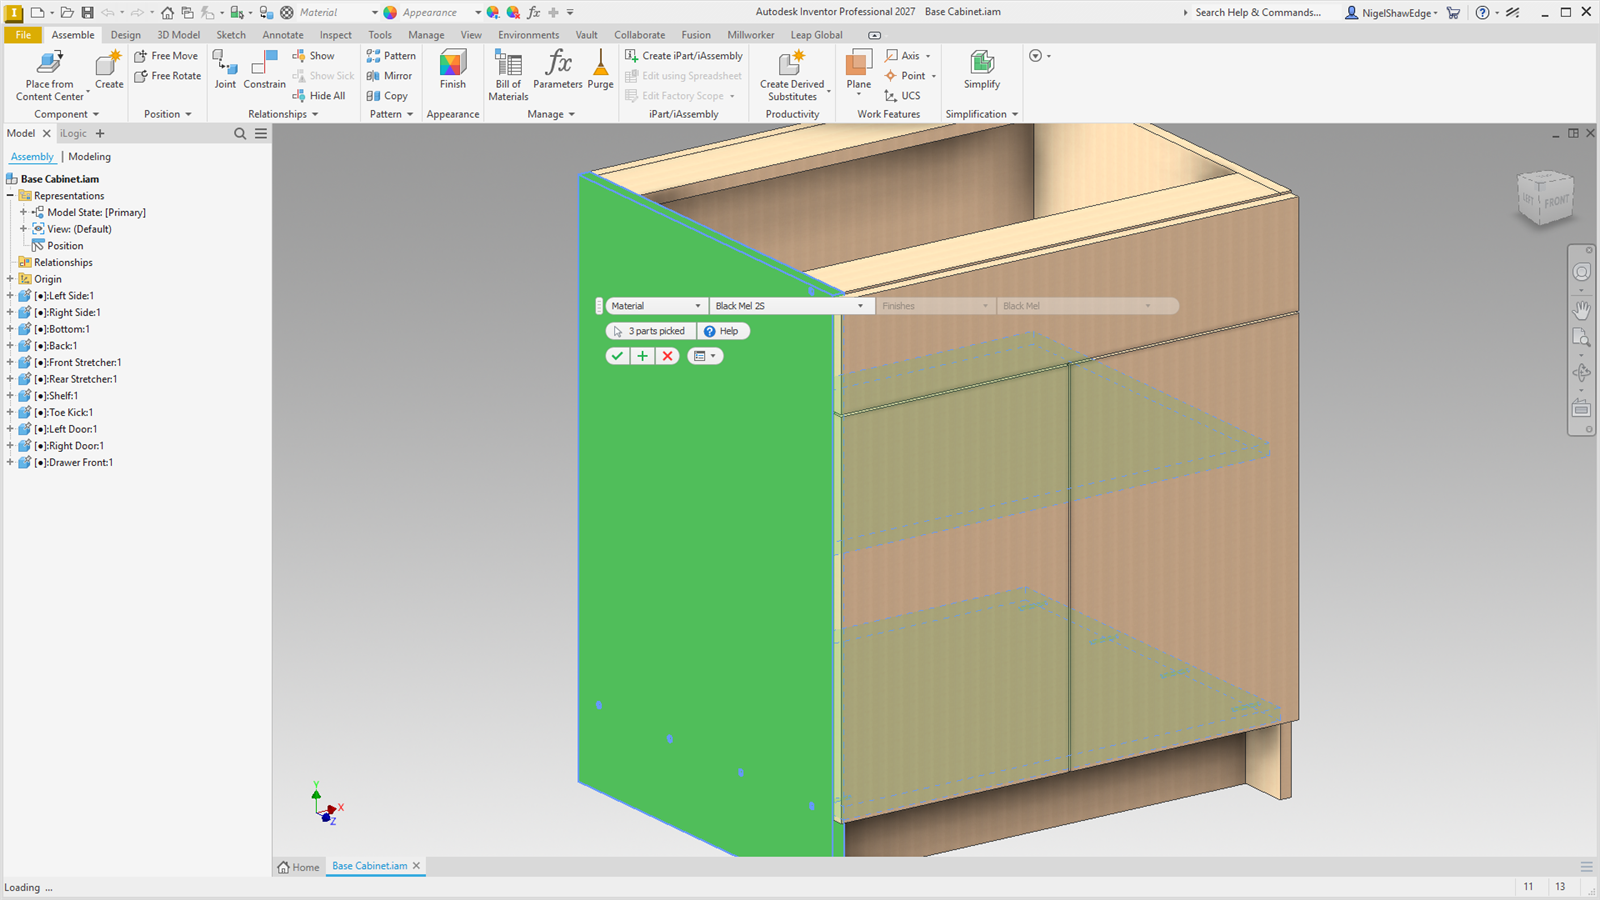
A material works as Assign material does in the manager (with its face finish); a finish goes on the whole part, after its old looks are taken off (banded and veneered faces keep theirs). A veneer goes on both large faces as Face 1 and Face 2 (the panel's grain is marked along the face when it has none); a PLAM goes on both faces as their finish. Each gets the project's code for it from the workbook. Picked parts light up filled in green, every face, so they show in a busy model. The last choice is remembered for the Inventor session. Content Center parts are left out.